How to Delete iPhone/iPad/iPod Touch Documents in iTunes
“I am an iPad user. I have discovered that there is no file delete button in iPad iTunes, which is really not convenient. That is strange and unreasonable for users. Is there no way for us to delete the invalid or unwanted document and files in iTunes on iPad?”
I believe many people have encountered this kind of problem and don't know how to delete iPhone/iPad/iPod Touch documents. Fortunately, this matter can be directly solved by iTunes. Let's see how it works.
>> How to Delete iPhone/iPad/iPod Touch Documents in iTunes?
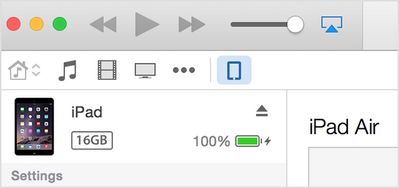
Step 1. Open iTunes and connect your iPhone/iPad/iPod Touch to your computer
Plug your iPhone/iPad/iPod Touch to computer with USB cable, and then select your device after it is recognized.
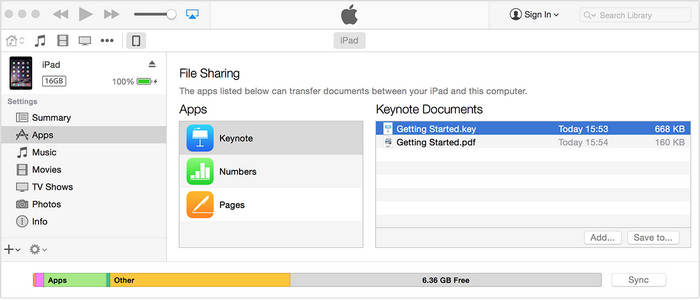
Step 2. Select the files that you want to delete
Click Apps on the left list, then scroll down to the file-sharing section on the right.
Select the app with the file you want to delete.
Step 3: Confirm deleting
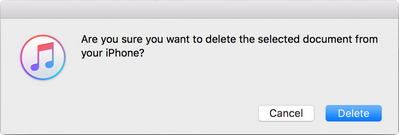
Then, you will see a window pop up and ask if you want to delete the selected document from your iPhone/iPad/iPad Touch. Just click delete to confirm.
Sometimes you may unintentionally delete your data, or lost data for whatever reasons. Syncios Data Recovery, which support to recover up to 12 types of data on your iPhone, iPad or iPod Touch. Only in few minutes, you can have your lost messages, notes, calendars, photos, videos, whatsApp messages back safely and without any quality loss.
>> How to Recover Lost Data on iPhone/ iPad/ iPod Touch?
Step 1. Download and install iPhone/ iPad/ iPod Touch data recovery tool on your computer
Download
Win Version
Download
Mac Version
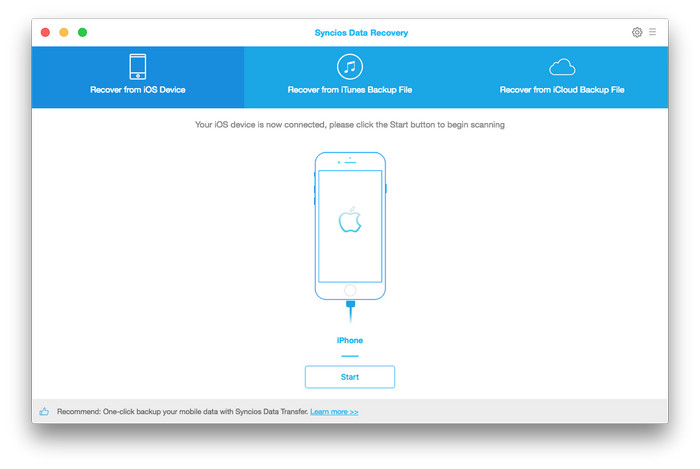
Run iPhone/ iPad/ iPod Touch data recovery tool on your computer, insert the USB cable for the iPhone into the iPhone's docking port, and insert the alternate end into your computer's USB port. Once connected, you will get the interface below.
Step 2. Scan your iPhone, iPad, iPod Touch
Once your device is recognized and connected successfully, click Start Scan, the program will start to analyze your device, then redirect you to scanning interface. The scan process will take you several seconds or minutes, because scanning depends on the file size stored on your device.
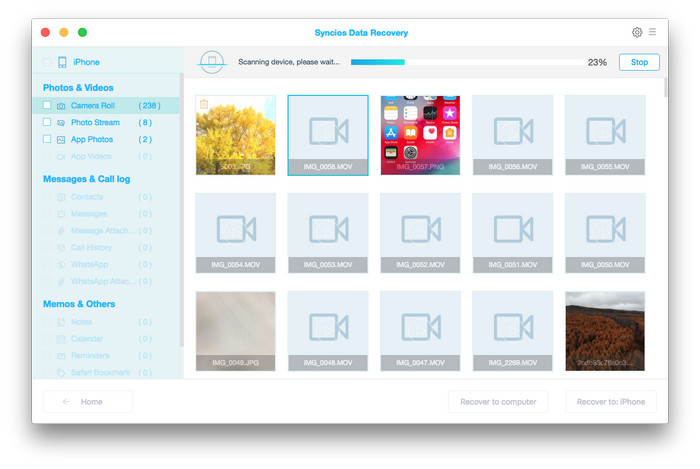
During the scan, make sure that your device is connected well and don't disconnect it for any reason, or you need to start it over.
Step 3. Preview and get back lost data from your iPhone, iPad or iPod Touch
After scanning, found data on your iOS device will be shown according to file types. You can preview them one by one so as to check how much of your lost data can be recovered. Then you can tick the files you need and click the Recover button to save them to your computer.
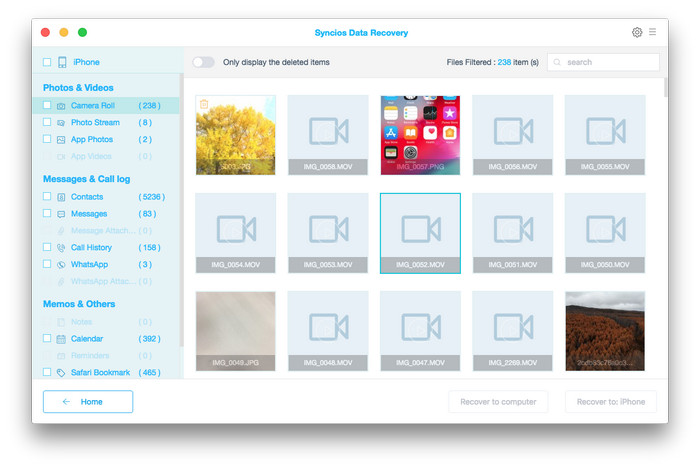
Note: You are allowed to switch "Only display deleted items" to ON, so you could preview the lost files only.
Supported Apple Devices and iOS Versions
| iPhone | iPhone 6s, iPhone 6s Plus, iPhone 6, iPhone 6 plus, iPhone 5S, iPhone 5C, iPhone 5, iPhone 4S, iPhone 4, iPhone 3GS |
| iPad | iPad Pro; iPad mini 4;, iPad mini 3/2/1, iPad with Retina display, The New iPad, iPad 2, iPad |
| iPod | iPod touch 5, iPod touch 4, iPod touch 3, iPod Touch |
| iOS | iOS 5, iOS 6, iOS 7, iOS 8, iOS 9 |
Have something to say about this tutorial? Share your comments below! Need help with something else? Submit your question via online form, we will reply you within 24 hours.

