How to Increase Images Size without Losing Any Details: A Quick Guide
"I took some images to share on my social media platforms, but they don't fit the platform because they are too small. I have tried to enlarge them directly, but they are blurred, what should I do?"
When it comes to picture editing, most people think of cropping, brightening, or adding filters. However, there are other photo-editing techniques that are less obvious and just as useful—such as image resizing.
And while scaling down images is usually a relatively straightforward process, increasing their size requires more thought and preparation. That’s because when you want to increase the size of an image digitally, you must consider the consequences of doing so. Usually, increasing the size of an image will reduce its quality. You can see this in many common file formats such as JPEGs, PNGs and even PDFs—they all have a fixed amount of data that cannot be exceeded without introducing distortion or irreparable artifacts into the image itself.
What could you do? After trying several image-resizing methods with no success, you now need a better solution that enables you to increase image size without losing any details.

Part1: What You Should Know Before You Begin
There are many factors to consider when you’re thinking about increasing the size of an image. Let’s take a look at the most important ones:
Resolution: Resolution is the number of pixels that are displayed on a digital image. If you have an image that is 500 pixels wide, and you increase its resolution to 1000 pixels, the image will appear larger, but the file size will also increase.
File Type: Increasing the size of an image will affect its quality in different ways depending on the file type. For example, JPEGs and PNGs, the most common file types used on Social Media platforms, have a fixed amount of data and will introduce "pixelation" or "blocking" when you enlarge them. On the other hand, GIFs don’t have any inherent quality issues, as they are not intended for photographic reproductions and are solely used for animation and design purposes.
Part2: How to Increase Image Size in Photoshop?
Let’s start with resizing images using Photoshop. First, open your desired image in Photoshop, and then select Image (or go to Image > Image Size) to open the "Image Size" dialogue box. Now select "Keep Aspect Ratio" and type in the number of pixels you want your image to be. When you resize your image, Photoshop will change the dimensions of your image while keeping the resolution the same. This is why your image will look larger but will remain of the same quality, as the amount of pixels in the image has not changed. The disadvantage of this method is that the image will appear blurry. That’s because the pixels in the image are simply being spread out to a larger surface area, making the image larger and therefore more pixelated.
![]()
Part3: How to Increase Image Size with AVC.AI
Of course, Photoshop may have a way to help you enlarge your pictures without losing the quality, but it's a bit difficult for people who are not good at photo editing to handle those complicated operations. Don't worry, there is another method that is suitable for anyone, whether you are a proficient image editor or a 100% novice, and that is to use the AI enlargement program to enlarge your image four times without losing the original image quality and even restoring the original image. All you need to do is to input the image, set the parameters and leave the rest to AI. AVC.AI is such an excellent tool. Let’s see how to increase image size with AVC.AI in just a few steps.
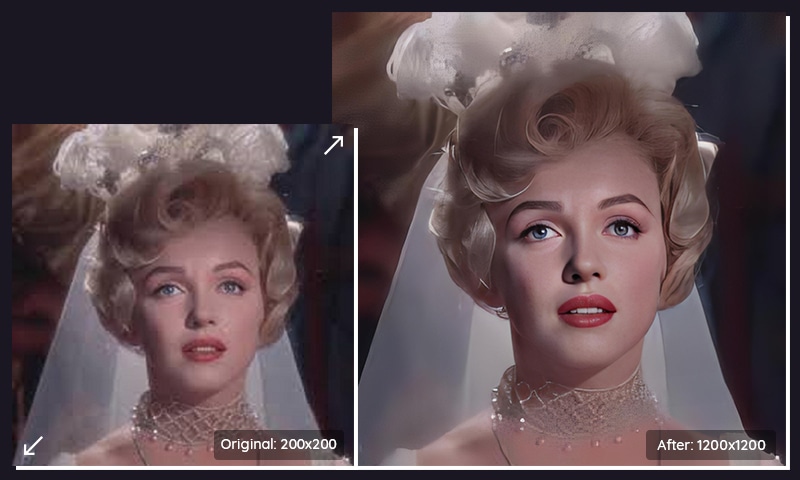
Steps to Restore Photos with AVC.AI
Step 1: Upload your Images
Go to AVC.AI website. And log into your account. If you don’t have an account, click on the Sign-up button to create one. Click the Upload Image button or drag and drop the source image directly into the site.
Note: Supported input formats are: *.png, *.jpg, *.jpeg, *.bmp, *.jfif, and *.webp.
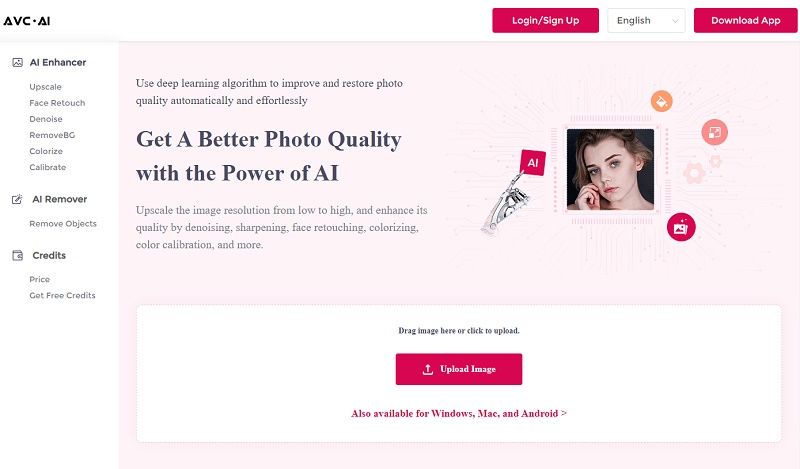
Step 2: Select AI Models
There are currently six models available: Denoise, Upscale, RemoveBG, Face Retouch, Colorize, and Color Calibrate. (Multiple models can be stacked together for processing). This post will only focus on its enlarge function. So you have to check Upscale and select the upscaling scale.
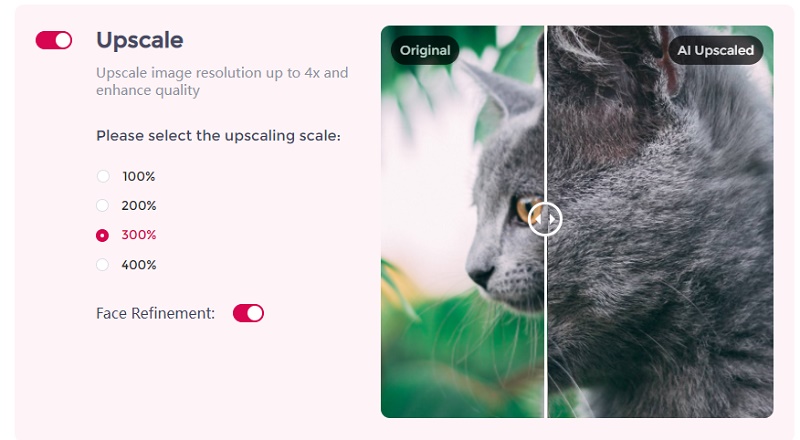
Step 3: Start Processing
After all the parameters are set, click on the Start Processing button to start the process. It will finish processing in just a few seconds.
Step 4: Preview and Download Images
When it is finished, you can click the Eye button to preview the results. If you are satisfied with it, then click Download Image to save the processed photo.
Note: The processed photos will be deleted after 72 hours to protect your privacy, so please download them in time.
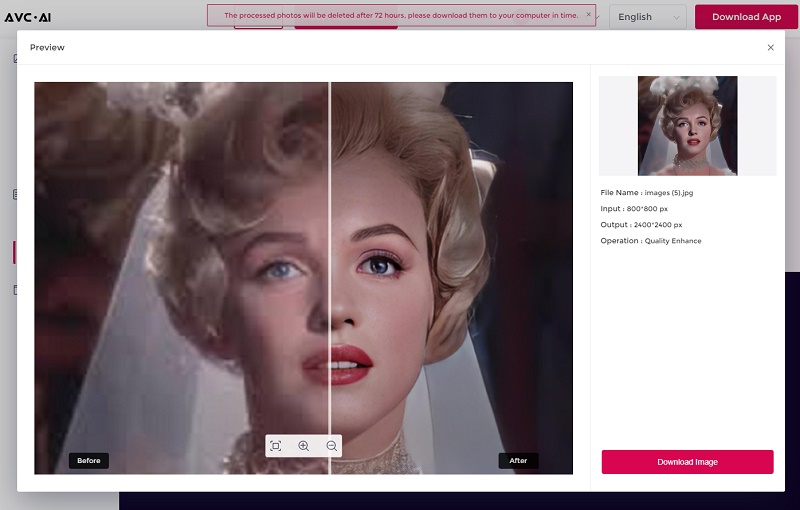
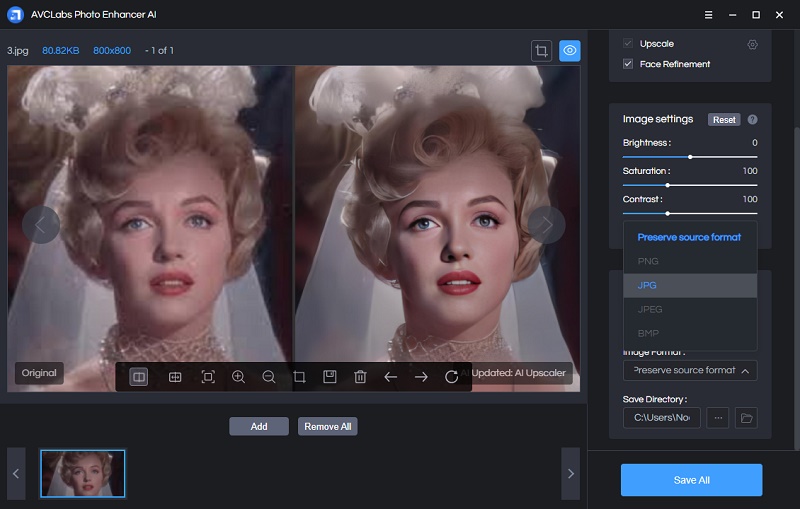
However, AVC.AI doesn’t support changing the output format currently. If you need it, you can download its desktop version, AVCLabs Photo Enhancer AI, which not only supports changing the output format but also offers more space for image creation. This version, like the online version, offers the opportunity to try it for free.
Conclusion
While increasing the size of your images is a great way to add visual appeal and increase their shareability, you must consider the consequences of doing so. If you increase the size of an image without increasing its resolution, it will appear larger but will be pixelated. That’s because the image is being spread out to a larger surface area, making it larger and therefore more pixelated. For best results, try to upload high-quality images. If you ever find yourself in a situation where you want to increase the size of an image without losing any of its details, you can use an automated application like AVC.AI or AVCLabs Photo Enhancer AI to do the job. With these tips, you will be able to increase the size of your images and ensure that they are of the highest possible quality.
Download AVCLabs Photo Enhancer AI
Video Tutorial: How to Enlarge Images Online without Losing Quality
Syncios D-Savior
Recover all types of data from HDDs, USB drives, SD cards, SSDs, etc. Learn more >>
Photo Enhancer AI
AI Image Upscale, Denoise, Colorize, Sharpen and Calibrate to enhance your photo quality.
AI Online Image and Video Tools
More AI-Powered Products
Tricks and Tips
- Top 8 AI Image Generators No Restrictions in 2026
- How to Blur Video in Canva: 5 Super Easy Steps
- 3 Ways to Fix Out-of-Focus Video: A Step-by-Step Guide
- Top 3 8K Video Players for PC in 2026 [Free & Paid]
- How to Convert Videos from 480P to 1080P
- Snapchat Face Swap: How to Change Face and Its Alternatives
- AI Video Upscaling: An Easy Way to Upscale Video to 1080p or 4K
- Perchance AI Image Generator: Full Review & Best Alternatives
- Topaz Video AI Review 2026: Is It Worth it?
- Free to Upscale SD Video to HD, 4K, and 8K in 2026
- Best 7 AI Hentai Generators in 2026 [Desktop & Online]
- How to Improve Video Quality Online for Free
- Best 5 Online Tools to Turn Pictures Into Coloring Pages For Free
- 10 Best Furry AI Generators to Free Create Fursona Art
- How to Blur the Background in Microsoft Teams on Windows, Mac, iOS and Android
- How to Unblur an Image
- 3 Best Forensic Video Enhancement Software
- 3 Methods to Fix Out of Focus Photo Easily in 2026
- 6 Best AI Photo Restoration Apps to Restore Old Photos
- How to Get Good Video Quality on CapCut Desktop [5 Ways Included]
- Sharpen Blurry Photos Online for Free
More Hot Articles
- 5 Unrestricted AI Image Generators in 2026 [Free]
- Best 4 AI Clothing Removers to Remove and Change Clothes in Photos
- Gramhir.pro AI Photo Generator Review and Its Alternative
- How to Mosaic Face in Videos to Keep Privacy Safe
- 11 Best Free Video Editing Software for Beginners (PC and Mac) in 2026
- How to Blur Background in iPhone Video (6 Practical Methods)
- How to Blur Licence Plate in Video: 5 Methods to Protect Your Privacy


