![]() One management tool for all smartphones to transfer files between PC & iOS/Android devices.
One management tool for all smartphones to transfer files between PC & iOS/Android devices.
When it comes to sync your iPhone, iPad or iPod with iTunes, you may connect your iOS device to iTunes with an USB cable and then do the following stuffs. Actually, you can also sync your iPhone/iPad with iTunes wirelessly. With some simple settings of iTunes, you are able to sync your iOS device with iTunes over WiFi network. As long as you connect your iOS devie and computer to a same network, your tunes, movies, TV shows, and tones will all sync up, so you don't have to waste time plugging your stuff in. And now let's move on to the steps.
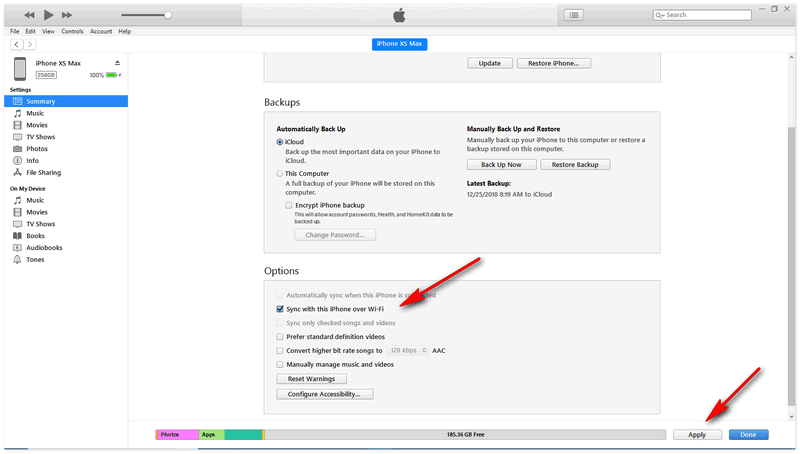
Of course, before we get started, in order to get everything ready, it's recommended to update your iTunes to the latest version. And to enable wireless synchronization, we need to do a wired connection at the first time.

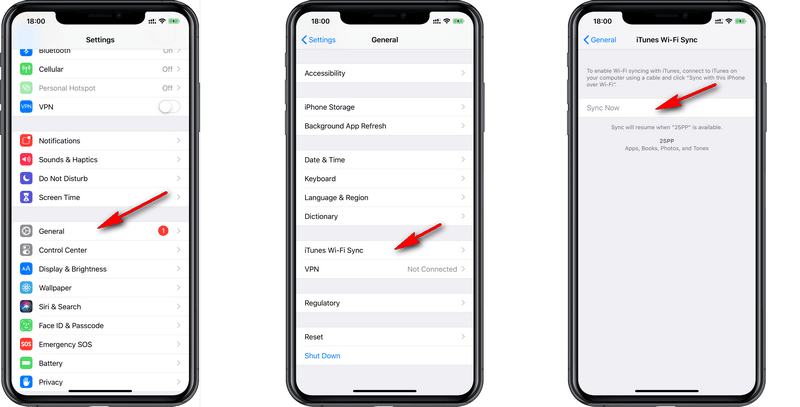
After done the settings above, now you're set up to sync via Wi-Fi. Of course, before you want to perform syncing your iPhone with iTunes, make sure your device has been connected to the same WiFi with the computer do. Then on your iPhone:

Update iTunes or iOS version.
The first thing to do when your iPhone or iPad failed to sync over WiFi is updating your iTunes or iOS version. Moreover, if you just update your iTunes, a reboot of your computer is needed, restart your iOS device if necessary.
Reset the network settings on your iPhone or iPad
You can try to forget the network on both of your computer and iOS device first, the step is simple. And if it is still not working, it's recommended to reset the network settings on your iPhone or iPad. Find Settings on your device, tap General, Reset, Reset Network Settings. You will be asked to enter your password. Enter your code and then try syncing again over WiFi.
That's all, do you successfully sync your iPhone or iPad with iTunes wirelessly after reading this post? If you encountered some problems while performing this, please simply leave a comment below, we will try to help you through it.