How to Download Photos from iCloud to Computer
iCloud might be the best assistant for iOS users, we love syncing our data to iCloud for purpose of saving iPhone storage or making a backup of iPhone data. It's so convenient that we even don't need to do anything to make it, since it can be done automatically while the phone was connected to a charger and WiFi network. Even if some users don't use iCloud to backup phone data, while iCloud Photo Library is still widely used. With iCloud Photo Library, we can easily sync all photos to iCloud and access them on other devices effortlessly. However, what annoys most is that Apple only offer 5GB free space, which is obviously too small to save our massive data so you need to pay for more if you want larger space. Even so, with more and more photos we taking and the increase of other data, we might run out iCloud storage one day. So we need to download the photos from iCloud to keep a local backup so as to release the space on iCloud. And this tutorial is here to give some options to help you download the photos from iCloud. And now let's get started.
Part 1: Transfer iCloud photos to computer for iCloud.com.
If you don't want any tools and just want to download the photos directly, you can simply login to iCloud.com to manually download them. Find the details below.
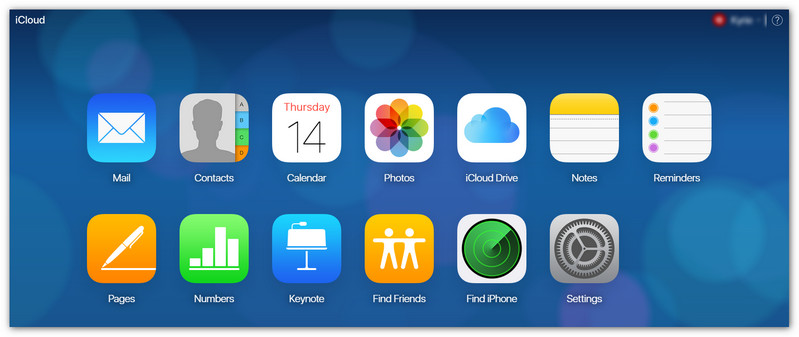
Step 1: Open iCloud.com with your browser and enter your Apple ID, if you enable Two-Factor Authentication, you also need to input the security code generated on your iPhone. And then click on Photos.
Step 2: Then all photos&albums will be listed out, simply select your desired photos from the album, and click on the download button on the right top corner to download selected photos to PC.
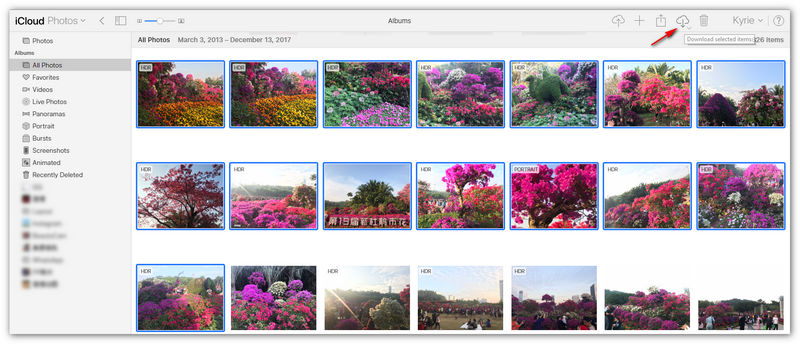
Note: Currently, if you want to select multiple photos at once, you can only hold Ctrl key and then click on each photo, Apple has removed the feature of selecting all photos at once, such a stupid move. Hope Apple restore the feature in the future.
Solution 2. Transfer all iCloud photos to computer with iCloud for Windows.
iCloud for Windows, which allows you to access your photos, contacts, calendars, files, and more from any of your devices. With iCloud Photo Library, any new photos and videos that you take on your iPhone, iPad, or iPod touch automatically download to your PC. And you can upload new photos and videos from your PC so that you can access them from your other devices too.
Step 1: Download and install iCloud for Windows on your computer, and restart your computer. The program would open itself after restarting your computer, otherwise, you can open it manually, and sign in your Apple ID.
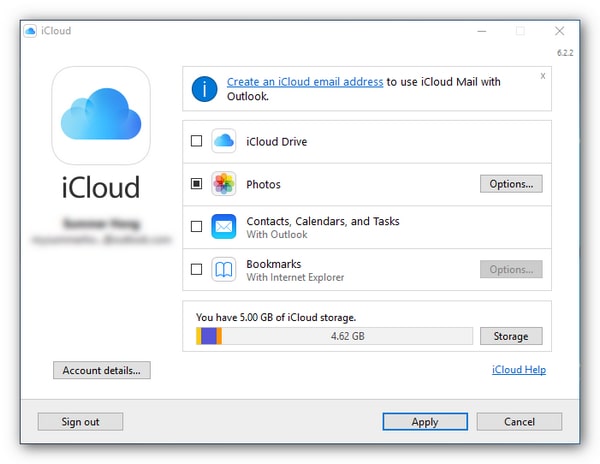
Step 2: Of course, make sure you have enabled iCloud Photo option and iCloud Photo Library on your iPhone X. After that, you are allowed to choose the features and content that you want to keep up to date across your devices, simply make the change as you like and click on Apply button, then click Close.
Step 3: Click on the iCloud program icon on the right bottom of your computer, select Download Photos, then you are allowed to download all photos or download your entire collection by year, hit Download.
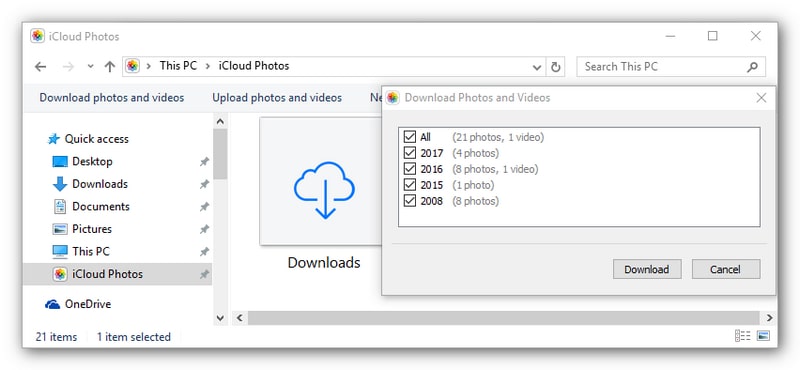
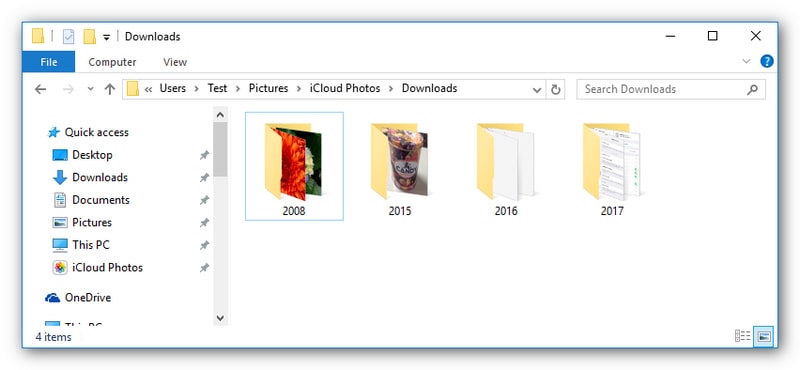
Step 4: After a while, all your photos would be downloaded to your computer. You can find them under My computer > iCloud Photos > Downloads folder.
Solution 3. Download photos from iCloud backup to computer.
The last method can be the fastest way to download iCloud photos to computer. iOS Data Recovery supports recovering data from iOS devices to PC&devices seamlessly, including contacts, messages, call logs, photos, pictures, videos, music and more. With the help of this program, you can transfer all photos and pictures from iCloud backup to PC with ease.
Step 1: Download and install iPhone Data Recovery on your computer from below. Launch it, select Recover from iCloud backup file mode on the homepage.
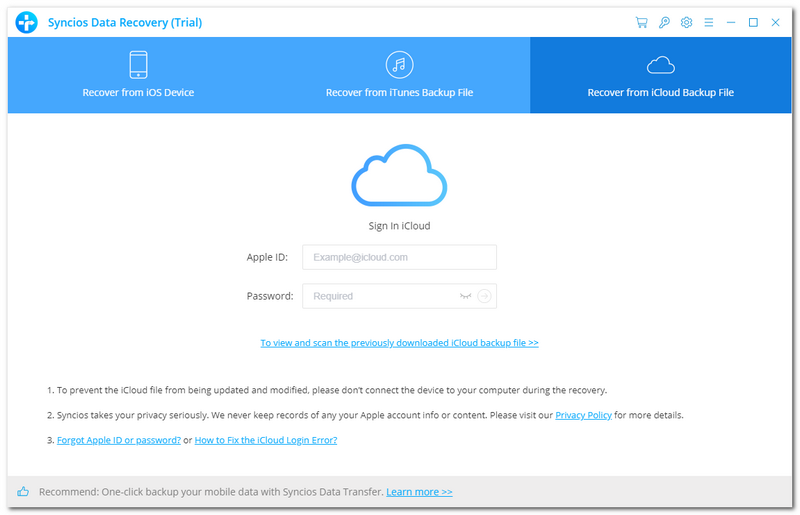
Step 2: You will be asked to login your Apple ID to download a iCloud backup to PC, so simply enter your Apple ID and select backup(s) to download to PC.
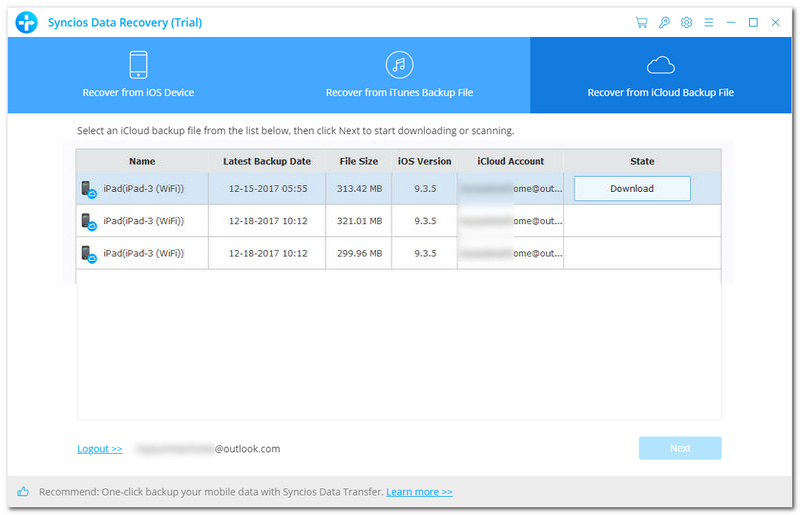
Step 3: After downloaded the iCloud backup(s) successfully, select a backup, the program will list all data out, simply check Photos on the checkbox, and click Recover to PC button to download them to PC.


