 >
How-tos >
Android Tutorial>
Transfer Photos Between Samsung Galaxy S25/S25+/S25 Ultra and Computer
The revolutionary camera that adapts like the human eye.
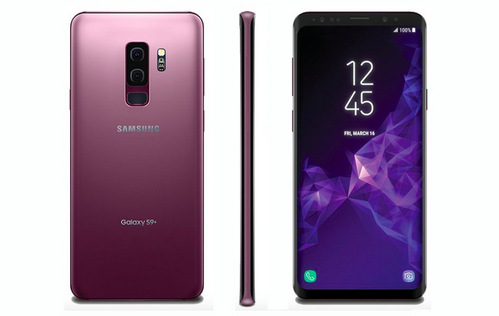
The Galaxy S9 only features a single lens on the rear of the phone, but Samsung has packed in lots of improvements in its effort to 'reimagine' the phone camera. There's a 12MP rear sensor with optical image stabilization, and a lot of the other features we've come to expect from high-end Samsung devices. One of the biggest upgrades is new dual-aperture technology, with the camera automatically adjusting the aperture depending on the scene you're shooting, much like the human eye adapts to changing light. This article is going to show you how to transfer photos between Samsung Galaxy S25/S25+/S25 Ultra and pc.
Part 1: Transfer Photos from Samsung Galaxy S25 to Computer
 Method 1: Backup S9 Photos to Computer with USB Cable
Now whatever Windows 7, Windows 8 or Windows 10 you are using, you can import photos to your computer with Windows built-in photos manager applications. If you don't want to use these applications, you can also backup your photos to computer with a USB cable only. Follow the steps below:
Step 1 Connect Samsung Galaxy S25 to your computer via USB cable, and your computer will recognize it as a removable USB drive.
Step 2 Drag down Notifications panel from the top of your S9's screen if it doesn't pop-up automatically, tap and connect as Media Device(MTP).
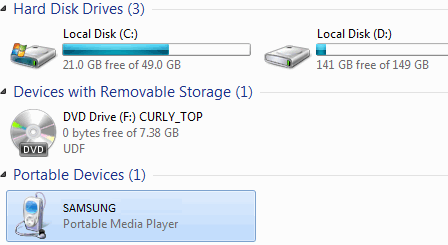
Step 3 Ensure Samsung Galaxy S25's drive installed successfully on your computer. Open the Portable Devices and find DCIM folder, where all the photos saved.
Step 4 Simply select and copy the pictures you want to transfer from your Samsung Galaxy S25 to your computer.
 Method 2: Backup S9 Photos to Computer via Samsung Manager
Step 1Download and install Syncios Samsung Manager on your windows pc. It's fully compatible with computer which run on Windows 10/8/7/Vista. Connect your Samsung Galaxy S25 to computer via usb cable.
Step 2 Launch Syncios Mobile Manager by clicking "Mobile Manager" on the main window of Syncios Toolkit.
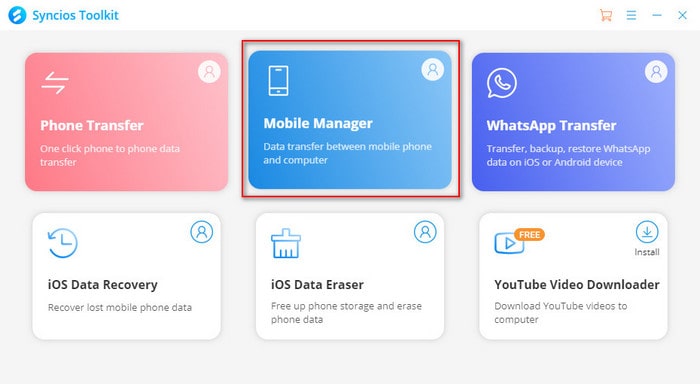
The program would recognize and detect your device automatically. Make sure you have enabled USB debugging mode on your Samsung Galaxy S25 device.
![]() TIPS: Any detection issue, please follow our tutorial.
TIPS: Any detection issue, please follow our tutorial.
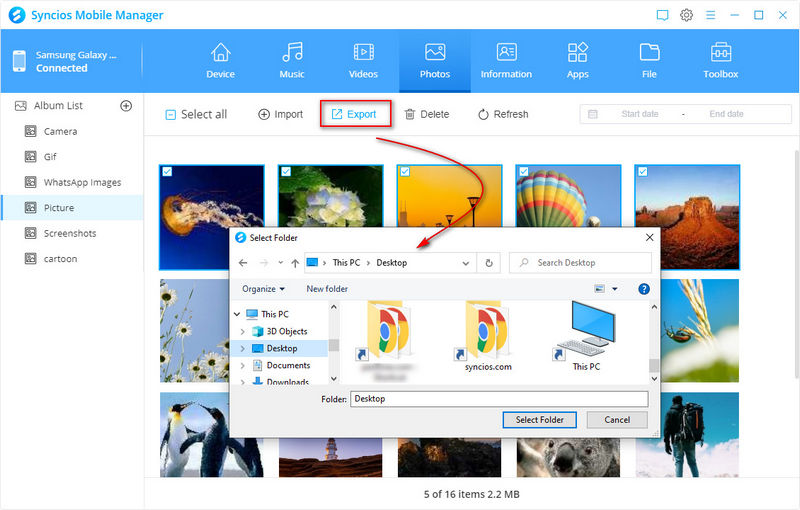
Step 2Click "Photos" option and select desired photo files or one photo album, then click on "Export" button to save photos to computer.
 Method 3: Backup All S9 Photos to Computer via Samsung Data Transfer
This powerful Samsung Data Transfer helps to backup all Samsung Galaxy S25's photos in only one click! Not only photos can be backed up to computer, other contents like music, video, contacts, messages, call history, apps and calendar can also transfer to computer.
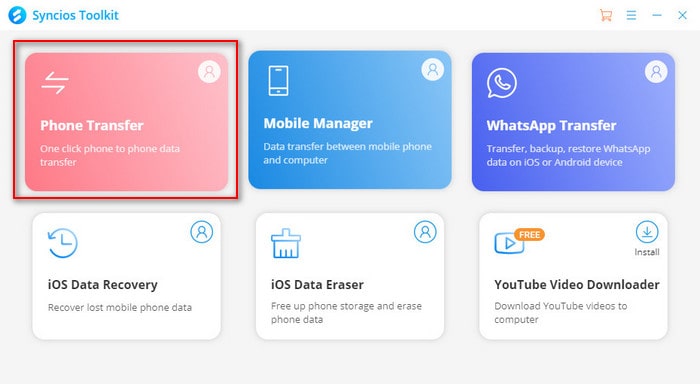
Step 1Launch the program by clicking "Phone Transfer" from the main window of Syncios Toolkit.
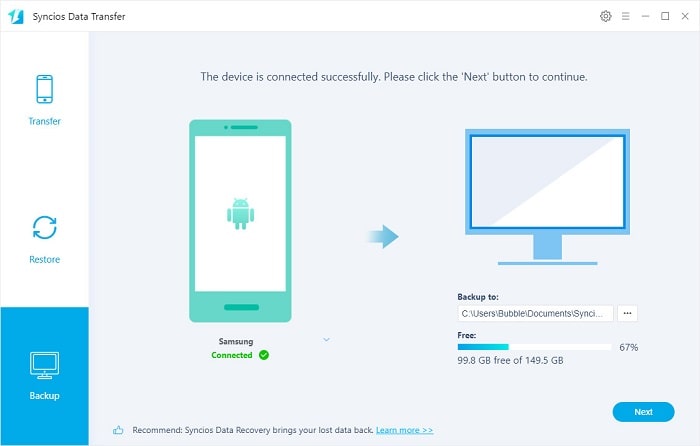
You will see three options: Transfer, Restore and Backup. Click "Backup" function. You can choose the backup path by clicking [...] as your will.
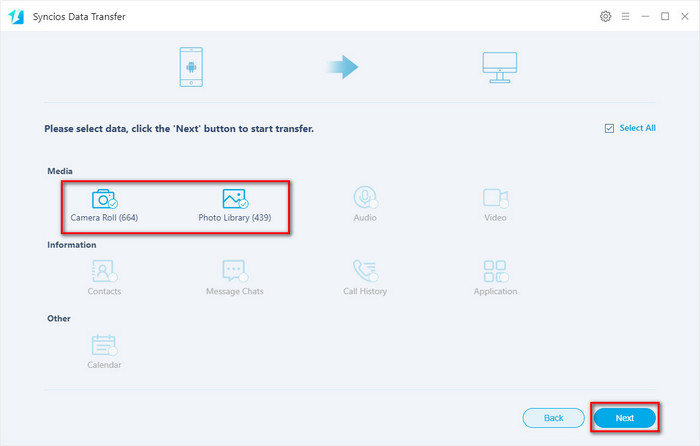
Step 2Syncios allows you to backup contacts, call logs, messages, photos, video, music, apps, bookmarks and calendars to computer. Simply check the backup list, choose Camera Roll and Photo Library and click "Next" button. Wait until you see "Transfer completed" message.
Part 2: Transfer Photos from Computer to Samsung Galaxy S25/S25+/S25 Ultra
 Method 1: Import Desired Photos to Samsung Galaxy S25 via Samsung Manager
Step 1Download and install Syncios Samsung Manager on your windows pc.
And run the program through Syncios Toolkit.

Connect your Samsung Galaxy S25 or S9 plus to computer. Make sure you have enabled USB debugging mode.
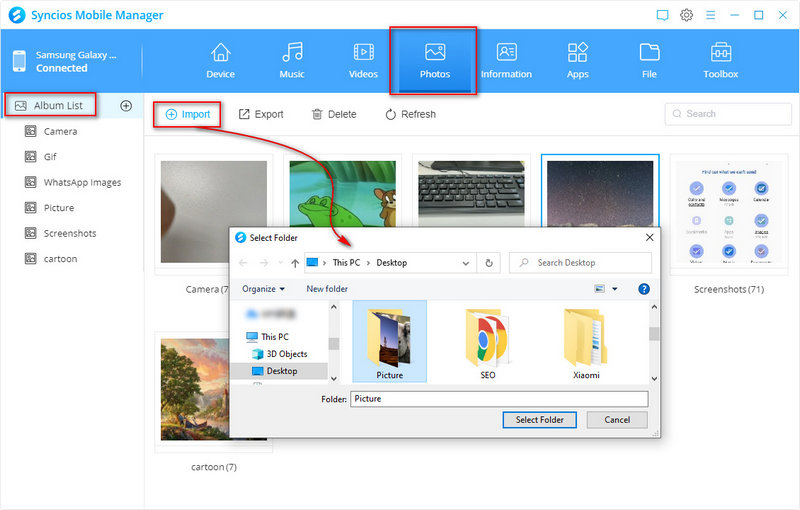
Step 2Click Photos on left catalogue. All your photo albums will show in Syncios. Choose the album you want to transfer photos to.
Step 3Click "Import" button, Syncios will allow you to select photos from your computer, then hit "Open" to transfer selected photos from computer to your new S9 or S9+.
![]() TIPS: You can choose photos on batch via CTRL/SHIFT button. Drag and drop pictures is also available.
TIPS: You can choose photos on batch via CTRL/SHIFT button. Drag and drop pictures is also available.
 Method 2: Restore Photos to Samsung Galaxy S25 via Samsung Data Transfer
This powerful Samsung Data Transfer helps to backup all Samsung Galaxy S25's photos in only one click! Not only photos can be backed up to computer, other contents like music, video, contacts, messages, call history, apps and calendar can also transfer to computer.
Step 1Launch Syncios Data Transfer though Syncios Toolkit.

Choose 'Restore' option this time, you will see four restoring mode. Choose 'Local Backup' to restore photos backups you've made before.
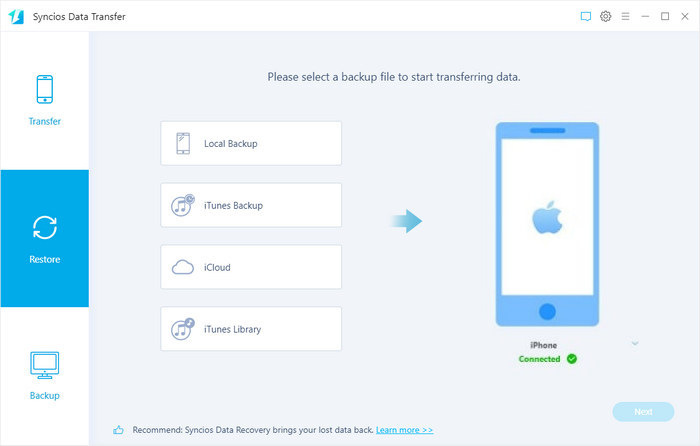
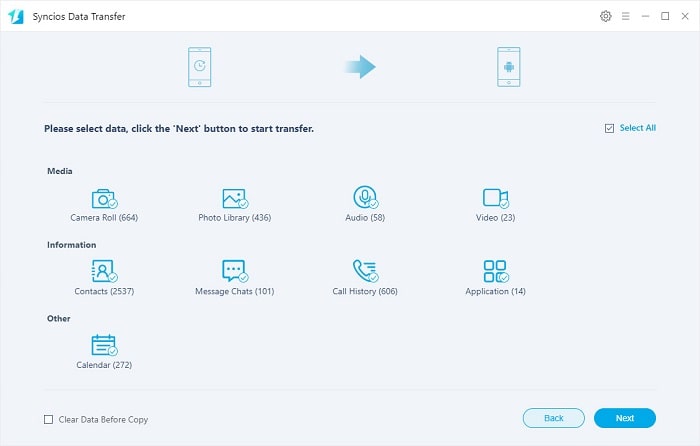
Step 2Choose 'Camera Roll' and 'Photo Library' here and click 'Next' to restore these photos to Samsung Galaxy S25.
YouTube Video: 3 Solutions to Transfer Photos to Samsung Galaxy S25/S25+/S25 Ultra
Conclusion
Besides transfer photos by manual, you still have other useful options to transfer photos between Samsung Galaxy S25 and computer. And that is what Syncios Samsung Manager and Syncios Data Transfer can help! Now start to back up your Samsung photos!

Features of Syncios Manager:
- Selectively Backup and Restore Contacts, Message, Call log, Music, Video, Photo, Ebooks, Apps and etc.
- Manage iOS devices/Android music, edit song details and deduplicate tracks.
- Preview and export SMS, Call History & Contacts to readable format on computer.
- Help to organize every iOS devices/Android's file.

