![]() One management tool for all smartphones to transfer files between PC & iOS/Android devices.
One management tool for all smartphones to transfer files between PC & iOS/Android devices.
Samsung has finally unveiled its long-awaited and much-rumored flagship smartphone. Well, two smartphones to be accurate. Joining the standard Galaxy S6 is the Galaxy S6 Edge that features a dual-curve display. The Galaxy S6 edge is powered by an octa-core Samsung-made chip built on a 14 nm node, complemented by an ARM Mali-T760 GPU. As for the rest of the specs, we're looking at a 5.1-inch Super AMOLED display with a super high resolution of 1440 x 2560 (577 ppi), 3GB of RAM, a choice between 32 GB, 64 GB, or 128 GB of internal storage, a 16-megapixel rear camera with a wider F1.9 aperture, and a 5-megapixel front-facing selfie snapper.

It necessarily to make a backup the data and file from your Samsung Galaxy S25 and Samsung Galaxy S25 Ultra right before you may try to tinker your precious device . Doing so, your data will be kept in a safer place and then you can easily restore it back into you phone later. Syncios has created mobile utility tools that allows users to easily backup, restore, and transfer all the important data and files in the phone storage. One of these utility tools that can be use to back and restore more than 10 types of data on Samsung Galaxy S25 and the Galaxy S6 Edge, including contacts, SMS, songs, videos, call logs, photos, Ebooks etc. Syncios Data Trnasfer offer both Windows Version and Mac Version for users to do the Samsung Galaxy S25/S6 Edge data backup and restore. Please dowmload a suitable version according to your computer’s operation system.
Download
Win Version
Download
Mac Version
Samsung |
HTC |
Xiaomi |
Sony |
Oppo |
Lenovo |
Motorola |
Huawei |
Nubia |
Meizu |
Vivo |
LG |
Connect your Galaxy S6 Edge to your computer and launch the Syncios Data Transfer. Don't forget to enable the debugging mode on your S6 Edge. And you now can see the primary window of Android Galaxy S6 Edge backup app. Importantly,connecting devices is required.Click the Backup button. Then it would display the the backup list.
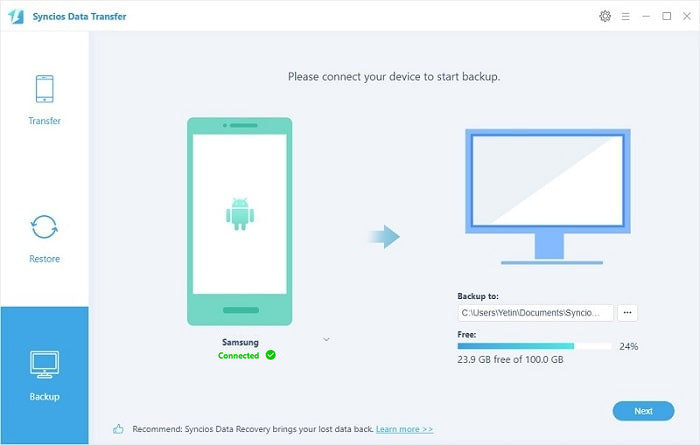
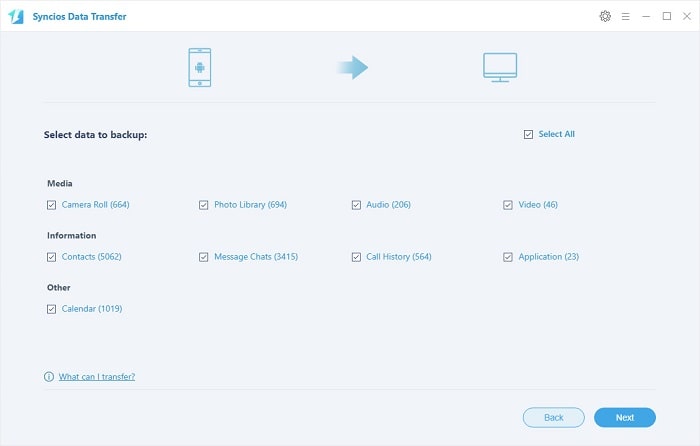
The following screen will allow you to select which items you would like to back up onto your computer. On the right side of the pane, you will also have the option to change or choose the location of the backup data. Select the [...] button that appears beneath the computer icon and select the location where you would like all data to be saved. After making sure your data are chosen, click Next button. During this time, make sure your Galaxy s6 edge is not disconnected from the computer. (To backup and restore WhatsApp history chats, pleasae refer to article : How to Backup and Restore WhatsApp History Chats on Samsung Galaxy )
When the extracting process is done, you will get the pop up message Copy Completed. Click OK, the backup folder will automatically open. When finished, safely disconnect the phone from the computer.
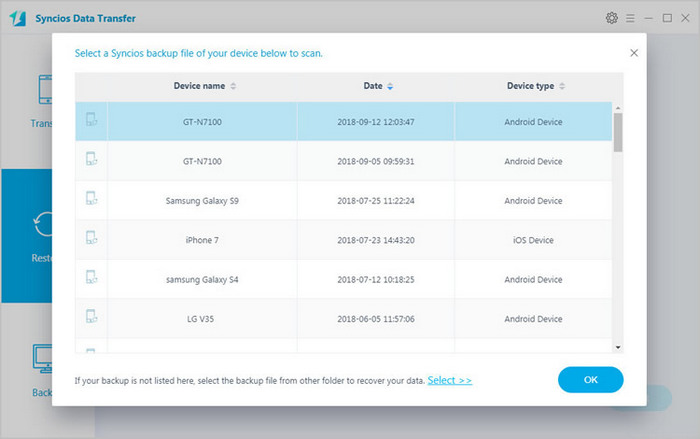
After backup completed, go to the homepage of Syncios and you will see the Restore option. Simply connect your new Samsung Galaxy S25 Ultra, then click Restore and choose "Syncios Backup". If you would like to move Samsung Galaxy S25 Ultra backup files to your new iOS device, please connect your iPhone, iPad or iTouch and click the restore button.
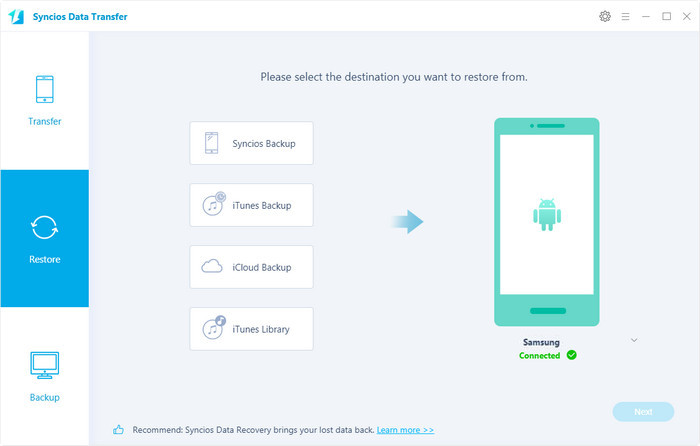
Now you can select your previous backup files from the list. Check data you would like to move to your Samsung Galaxy S25 Ultra on the middle checkbox. Click OK button, all of your selected files will be restored to the target device.
We should have realized how important it is to backup data. Fortunately, with the powerful Android Samsung Galaxy S25 manager, you can fulfill the backup task so easily and quickly. There is no need to worry about lost phone data any more. Just now, download Syncios Android backup and restore tool!
Download
Win Version
Download
Mac Version
Google owns the Android operating system so it has its own backup data tools that can be synced with your Google account. If you’re signed in to your Google account on your Android smartphone, your contacts are usually synced with your Gmail account. In the event that it isn’t synced, head over to Settings > Accounts > Google > Your Google Account and make sure the contacts field is checked.
Related Articles